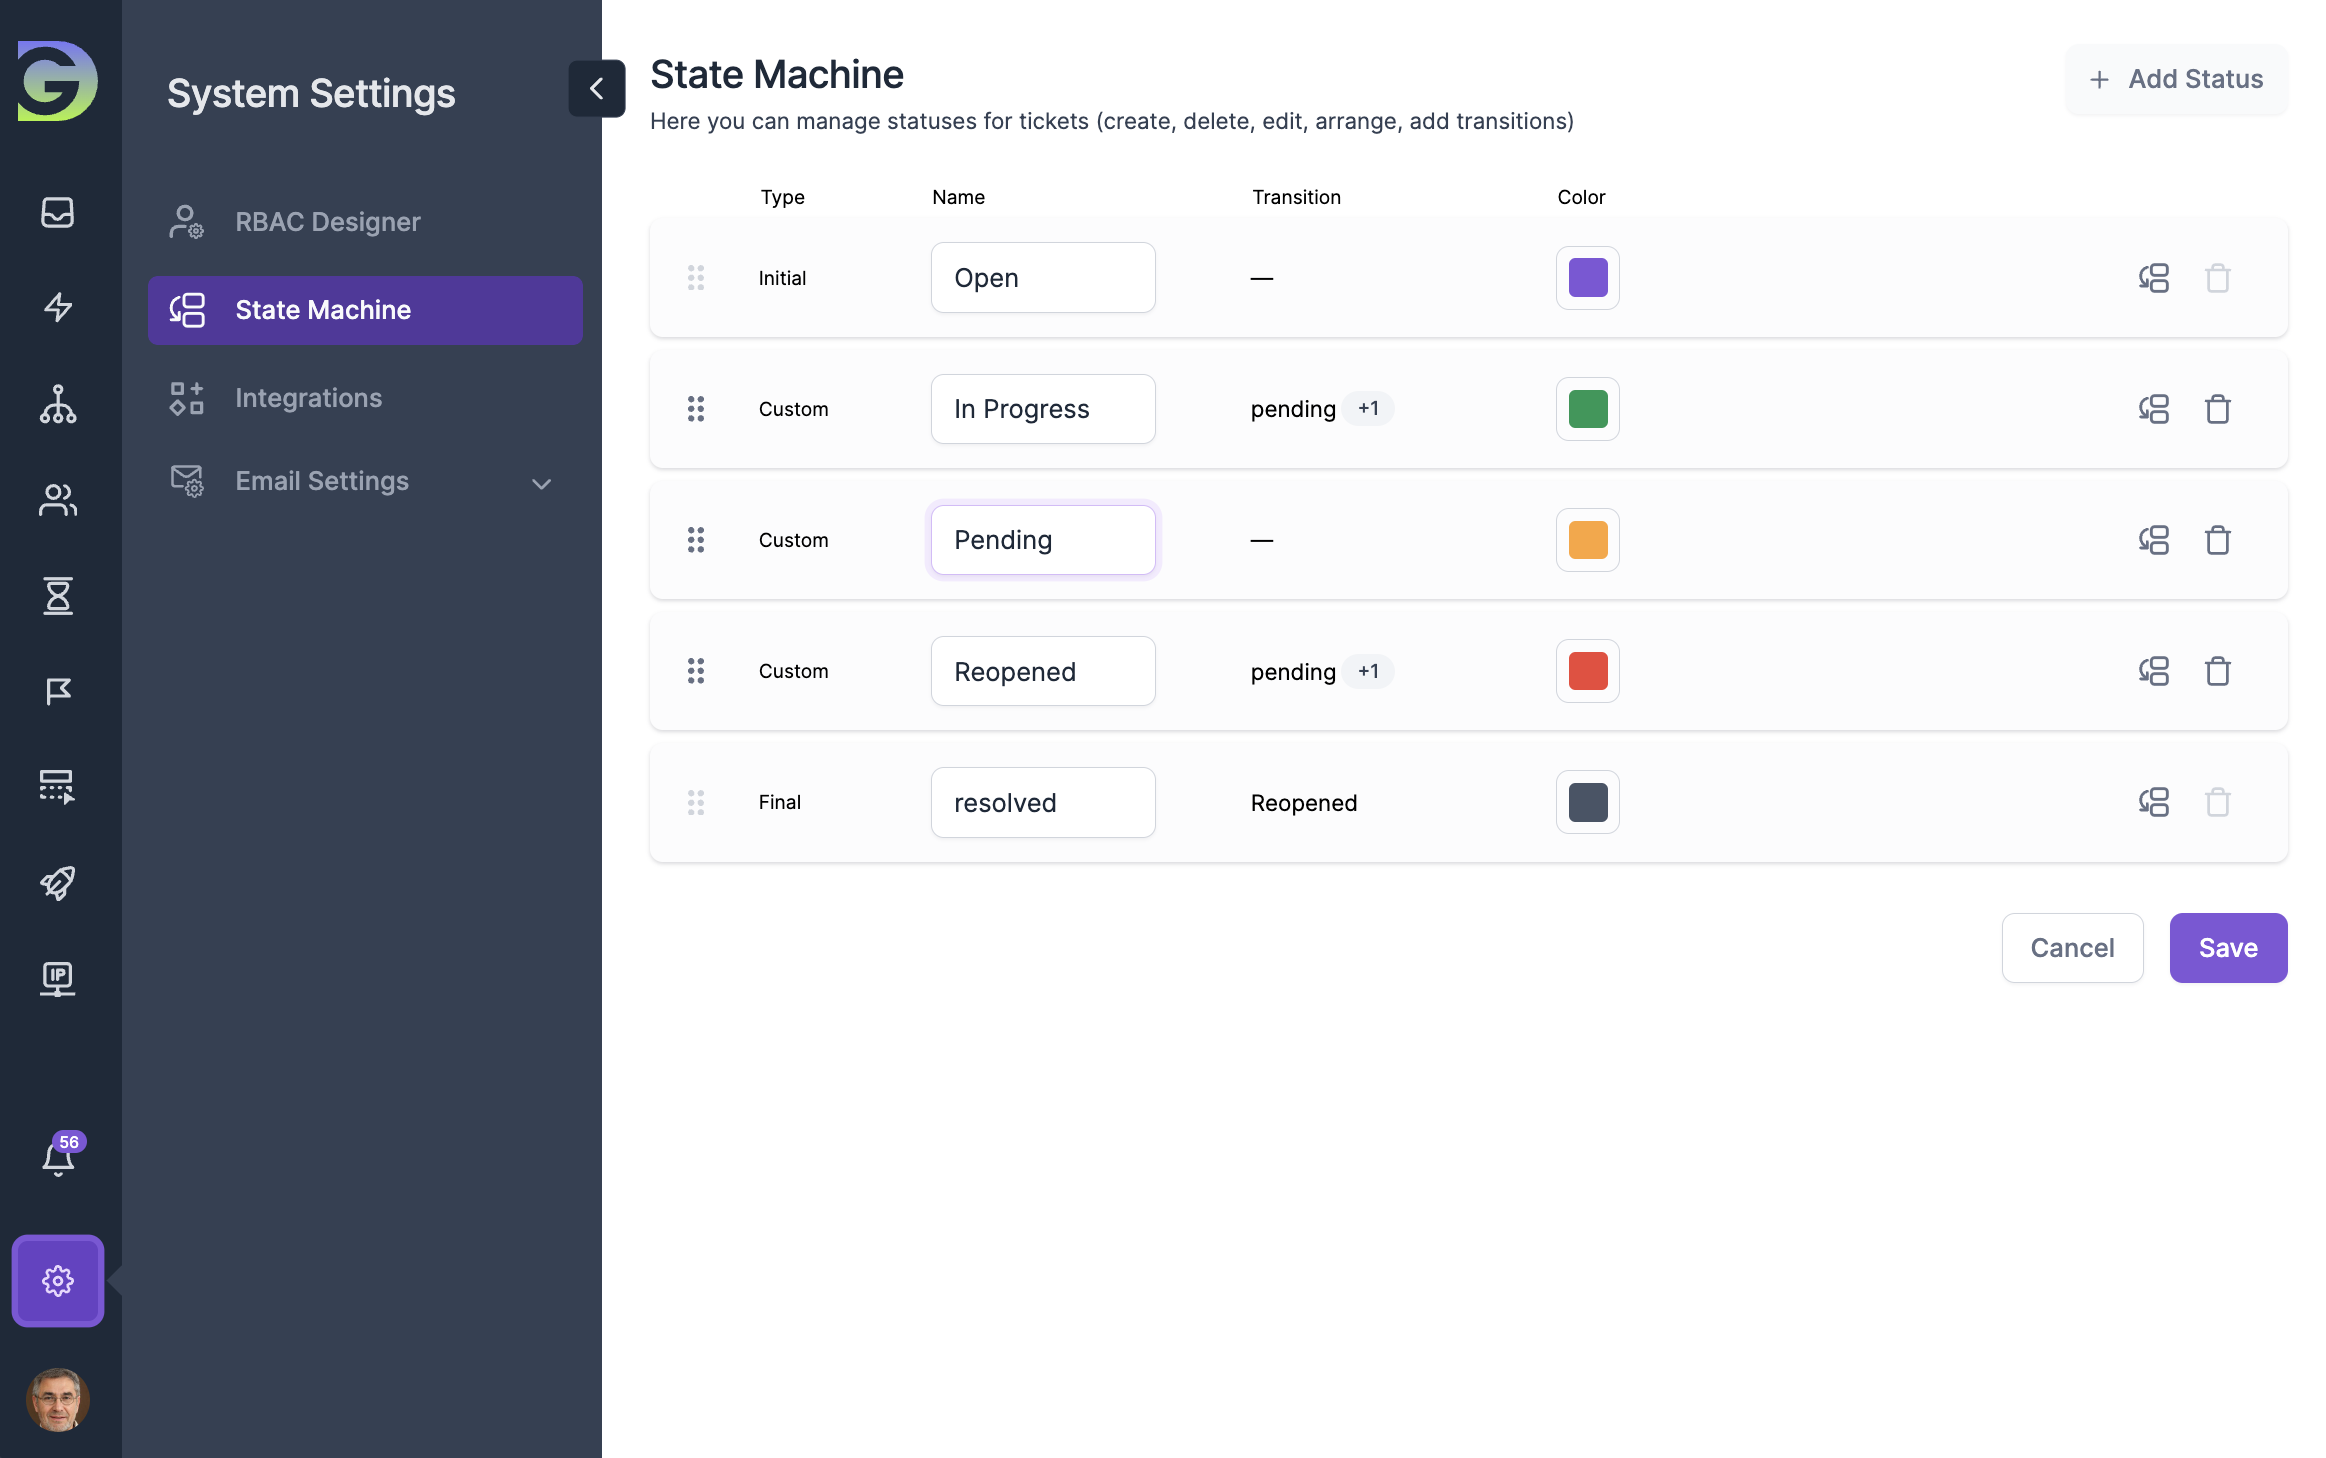
The State Machine is a status management system in the program. Here you can manage statuses for tickets (create, delete, edit, arrange, add transitions).
Ticket status is one of the main ticket fields that helps users and support agents track the progress and define business rules in the system. In simple terms, a ticket status shows you quickly what's going on with a ticket. Statuses help communicate within a company, and the ticket's status should be clear not only to the people handling it but also to others like stakeholders and even the customers who raised the ticket.

What type of statutes we have?
Statuses are categorized into three types: Initial, Custom, and Final. Each status can be personalized with a unique name, color, and configured transitions.
• Initial (“Open“) - initial status serves as the starting point for ticket processing and represents the default state for all newly generated tickets.
• Custom (“In Progress“, “Pending“, etc) - custom statuses refer to personalized labels or indicators assigned to tickets to reflect their specific progress or state within a workflow, providing a more granular and flexible representation of the various stages a ticket may go through.
• Final (“Resolved”) - indicates the issue in a ticket is successfully addressed. It's a crucial stage, showing the support team's actions to resolve the problem. This status doesn't close the ticket but precedes it.

What Is a Transitions in State Machine?
Transitions in State Machine refer to the movement or progression of a ticket from one status to another within the workflow. These transitions are part of the defined processes that govern how tickets are handled, resolved, and closed in the system.
Here's a quick look at the key benefits of Status Transitions in a ticketing system:
• Workflow Design: Grogu Desk allow organizations to design custom workflows that outline the sequence of statuses a ticket can go through. Transitions define how a ticket moves from one status to the next in this workflow.
• Status Sequences: Transitions create logical sequences between statuses, ensuring that tickets progress through stages in a systematic manner. For example, a ticket might move from "Open" to "In Progress" and then to "Resolved" in a predefined order.
• Automation: Grogu Desk include Automation features that trigger transitions based on specific conditions or actions. For instance, after resolving a ticket and after changing status to Resolved the system might automatically trigger an email notification to the customer.
• User Actions: Transitions can be initiated by user actions, such as a support agent marking a ticket as "Resolved" after providing a solution or a customer confirming that their issue has been resolved.
• Customization: In Grogu Desk you can customize the transitions between statuses to align with their specific workflows and business processes. This flexibility ensures that the ticketing system adapts to the unique needs of the organization.
• Visibility and Accountability: Tracking transitions provides visibility into the lifecycle of a ticket, allowing teams to monitor progress and ensuring accountability for resolving customer issues. It helps in understanding where each ticket stands in the overall process.


How to set up Custom Statuses in Grogu Desk?
Creating custom statuses in Grogu Desk is simple.
1. Log in to Grogu Desk.
2. Click on System Settings section.
3. Click on State machine sub-section.
4. Click on + Add Status button.
5. Type Status name (The name must be unique).
6. Select Color.
7. Click Add button.
You can also change the sequence of the statuses by using drag and drop.

How to add Transitions to Statuses in Grogu Desk?
1. Log in to Grogu Desk.
2. Click on System Settings section.
3. Click on State machine sub-section.
4. Click on + Add Transition button next to the status to which you want to assign a transition.
5. Select Status(es) for the transition in the To Status dropdown list.
6. Click Confirm button.


